User Guide
- Prepared by:
- Andrew Madison, Founder and CEO
- Document date:
- May 05, 2014
- Document number:
- 20140505-03
- Software version:
- 1.0.0
Table of Contents:
- System requirements
- Login screen
- Dashboard
- Templates
- Datacenters
- Devices
- Company
- Users
- Profile
- Info
- Features security
System requirements
InfraTrack is a web based utility that requires a modern browser. By modern, we refer to any browser that has HTML 5 support.
Browsers with HTML 5 support are:
- Mozilla Firefox 20+
- Google Chrome 25+
- Safari 6+
- Internet Explorer 10+
- Opera 11+
InfraTrack does not require any special plugins like Flash or Active-x making it available for Windows, Linux and Mac OSX.
Minimum recommended screen resolution is 1024x768 with a 24 bit color depth.
Open your favorite browser and point the address to your InfraTrack installation.
Login screen
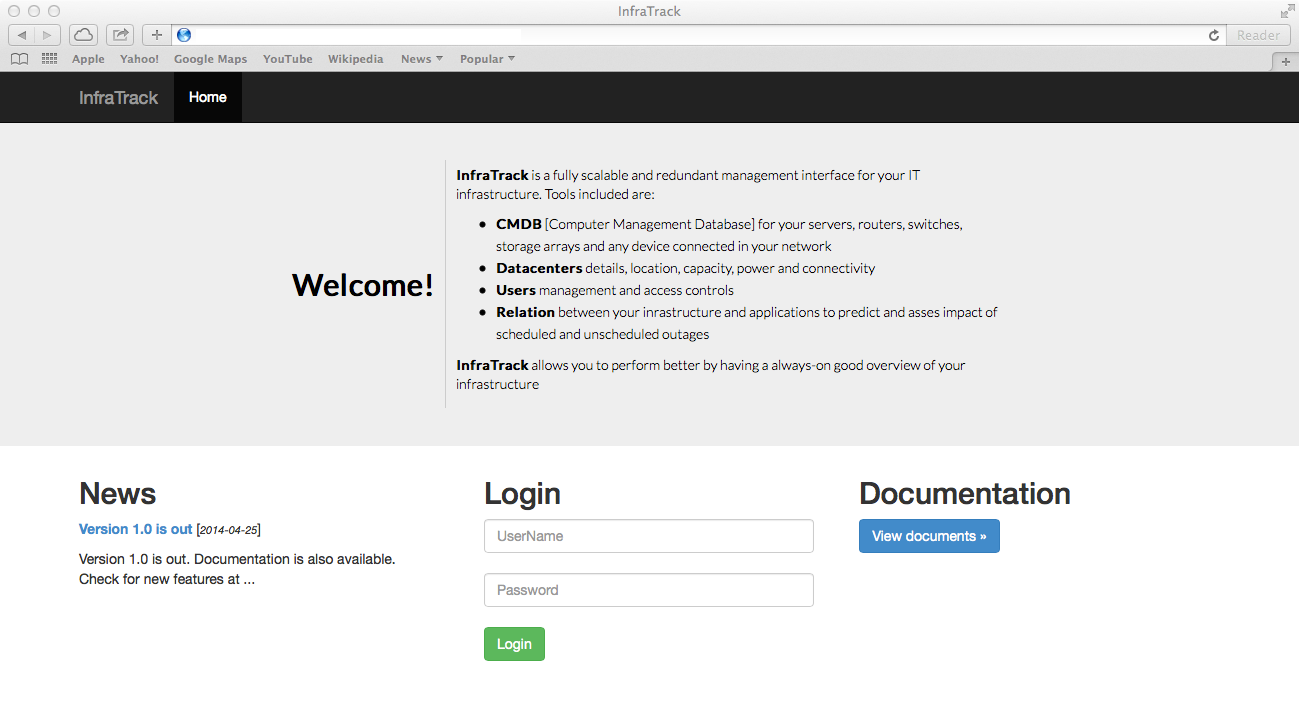
Type your credentials in the login field and click the Login button. To view documentation, click on the "View Documentation" button. A pop-up window will appear with links to available documents.
The left bar will present latest news from AM Data Soft. If the news section was modified by your system administrator, you may view internal news feeds pertaining to your company.
Once logged in, you will see the infrastructure "dashboard" with a brief summary of your inventory.
Dashboard
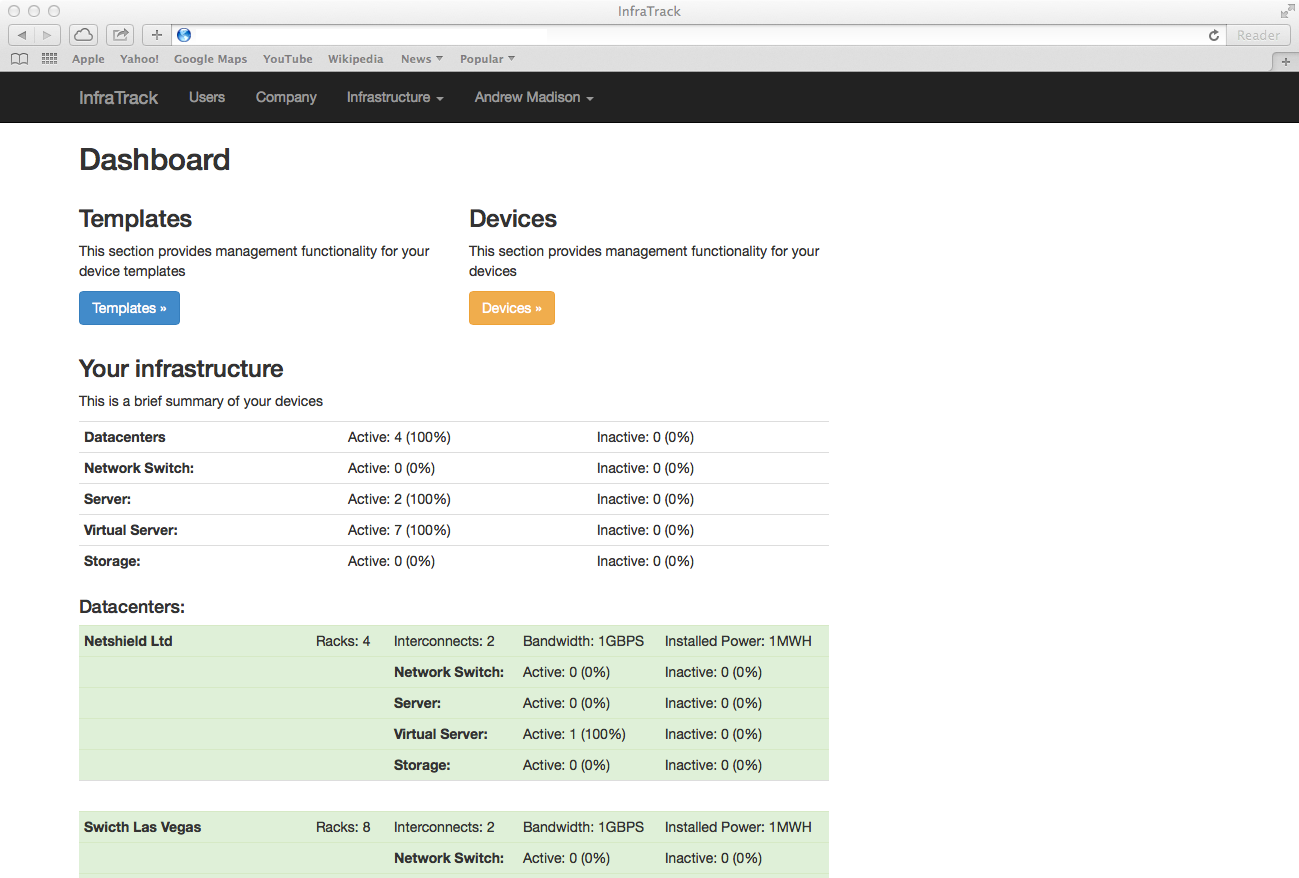
Datacenter background color coding represents:
- green: active data center
- red: inactive data center
The main destinations from this page are:
- Templates
- Devices
The above destinations can also be accessed from the top Infrastructure menu
Templates
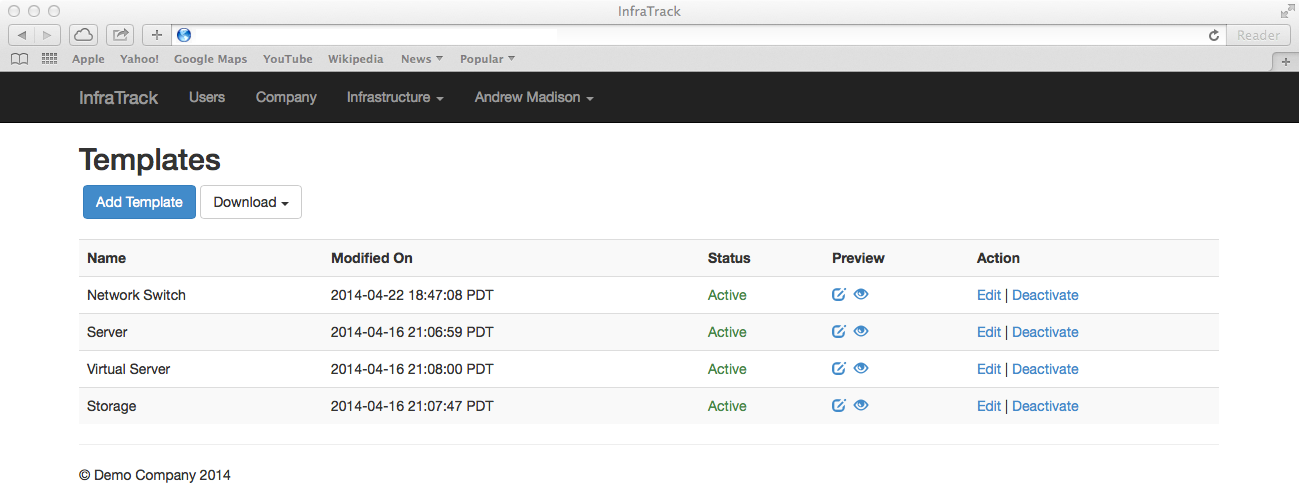
On the Templates page you will have the option of adding, modifying, previewing or deactivating a template. By default, InfraTrack comes with 4 pre-configured templates:
- Network Switch
- Server
- Virtual Server
- Storage
Network Switch template is designed for network devices like switches, router, access points and hardware firewalls as well as storage fiber switches.
Server template is designed for physical (hardware) servers located in a datacenter rack.
Virtual server template allows the user to add a virtual machine to an existing ESX/ESXi or other virtual hypervisor platform. This is very similar to the Server template with the exception of physical location.
Storage template is used for hardware Storage array and NFS/iSCSI services like NAS.
To add a new template, click the "Add Template" button.
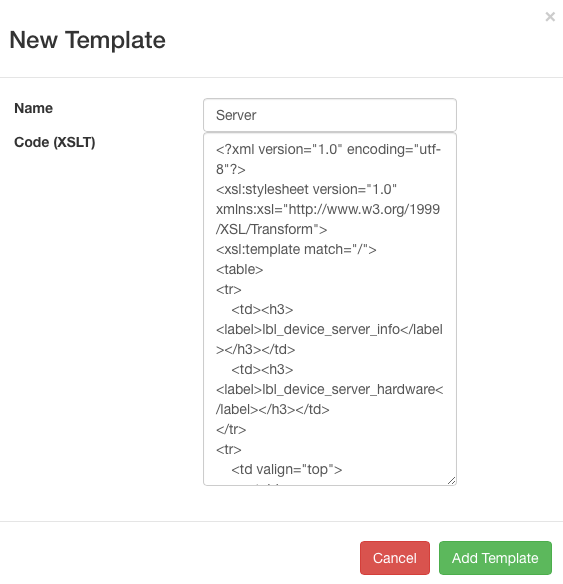
In the resulting pop-up screen, provide a name for the template and the XSLT code required for a proper page display.
The XSLT code supports 2 variables with <label> and <field> tags.
Example:
...
<tr>
<td><label>lbl_device_name</label></td>
<td><field>device_name</field></td>
</tr>
...
Before adding labels and fields to the XSLT template, please ensure that both objects are configured in the language file and the lib/form_fields.php descriptor of the InfraTrack Portal application. See the Administration Guide and consult with your application administrator before creating a new template.
Once the code is validated and all dependent objects available, click the Add Template button to save your template.
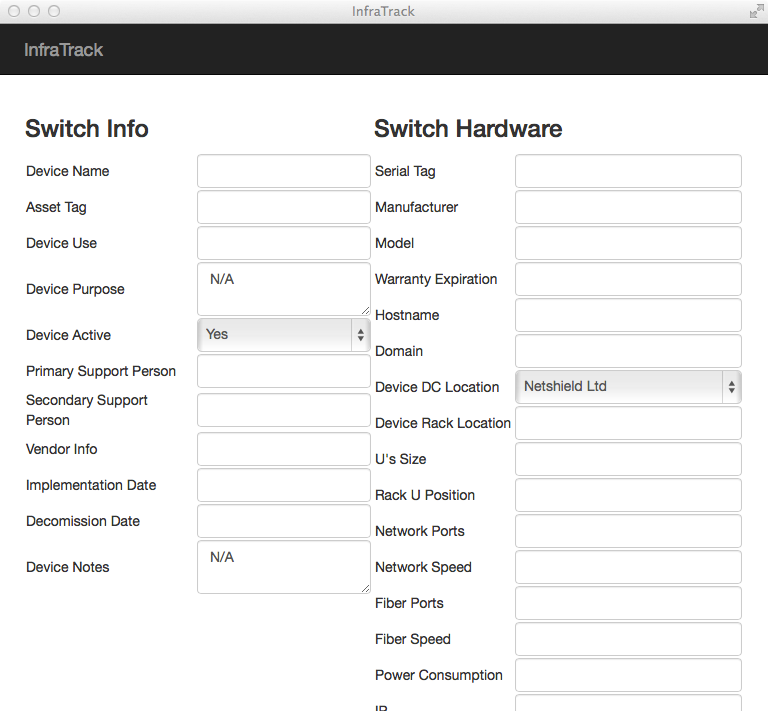
To view your new template, from the main page click the Preview links to view the template in Edit mode (as it would be in the device form) or filled out with dummy "var" data.
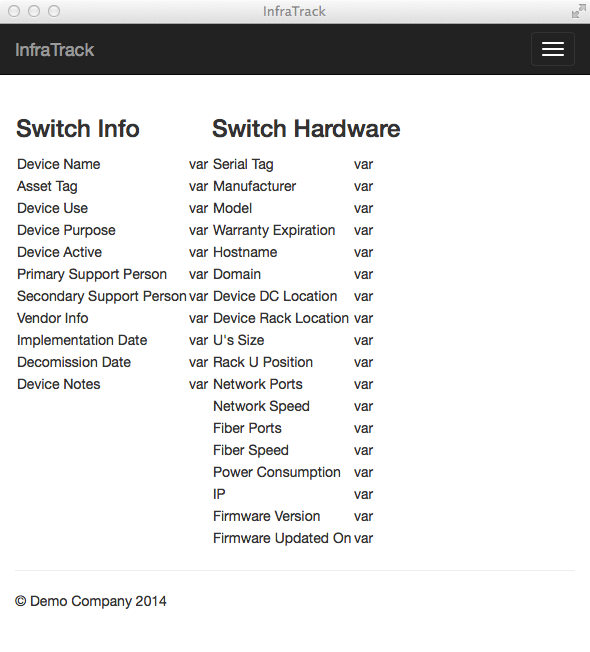
To edit a template, simply click the Edit button from the Template main view and make necessary changes.
Note:
Deactivating a template will automatically deactivate all devices using that template.
The Download option allows a user to download the entire template dataset as JSON or XML data for use with data modeling applications or Relational Database systems.
Note:
The communication protocol between the Web Portal and InfraTrack API is based on JSON objects sent via HTTP methods. This means that all data objects that support line breaks are BASE64 encoded for HTTP transmission. When downloading data as XML and/or JSON files, please ensure you BASE64 decode the data prior to use in another application.
Datacenters
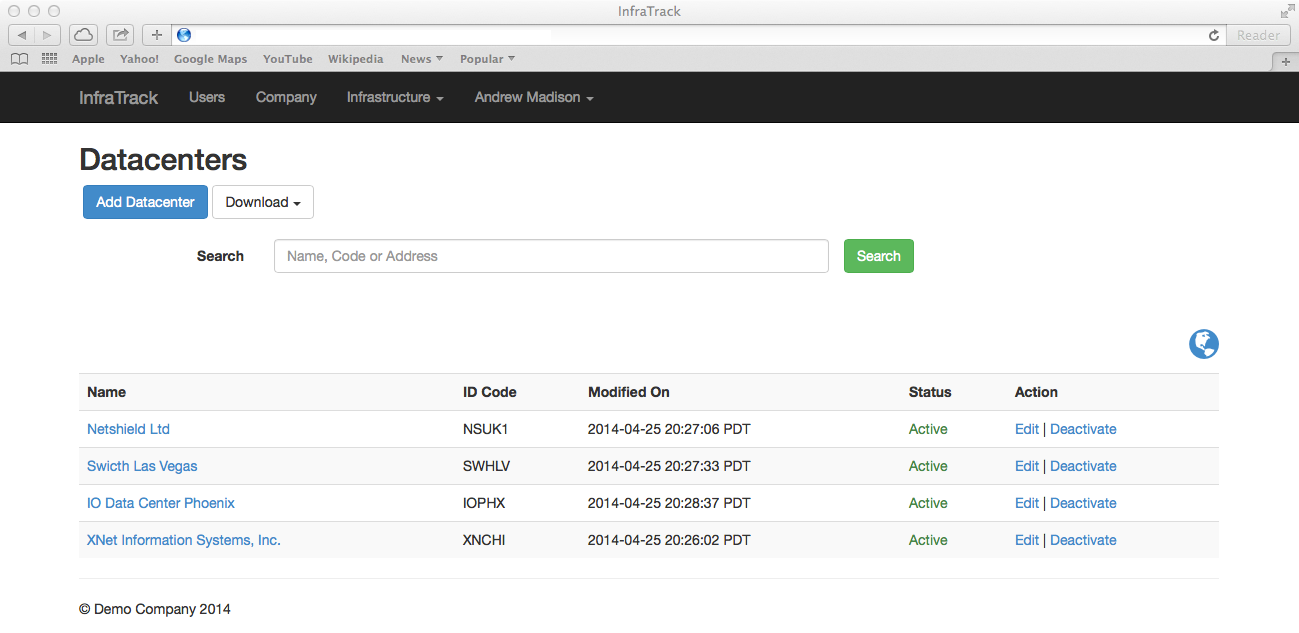
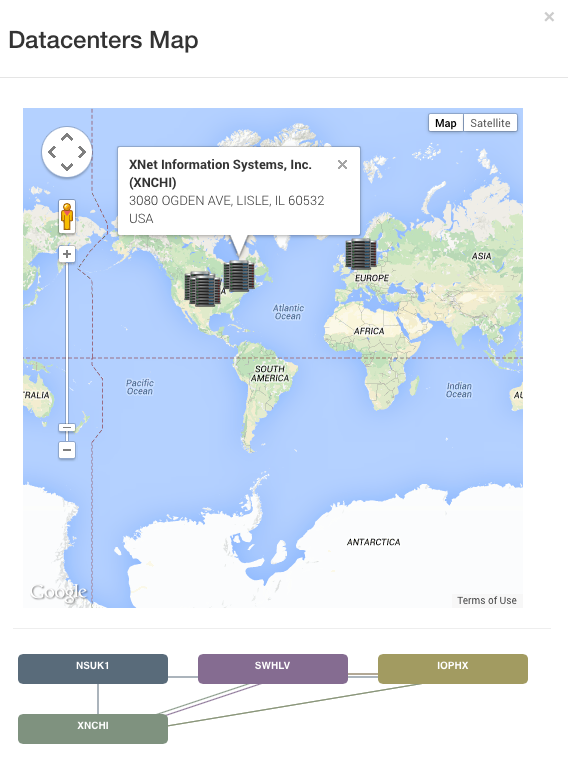
The main Datacenters view presents the user with a list of all available locations. Clicking on the globe, will place the locations on a map and will also show connectivity among the active datacenters.
To view details for a specific datacenter, click on its name.
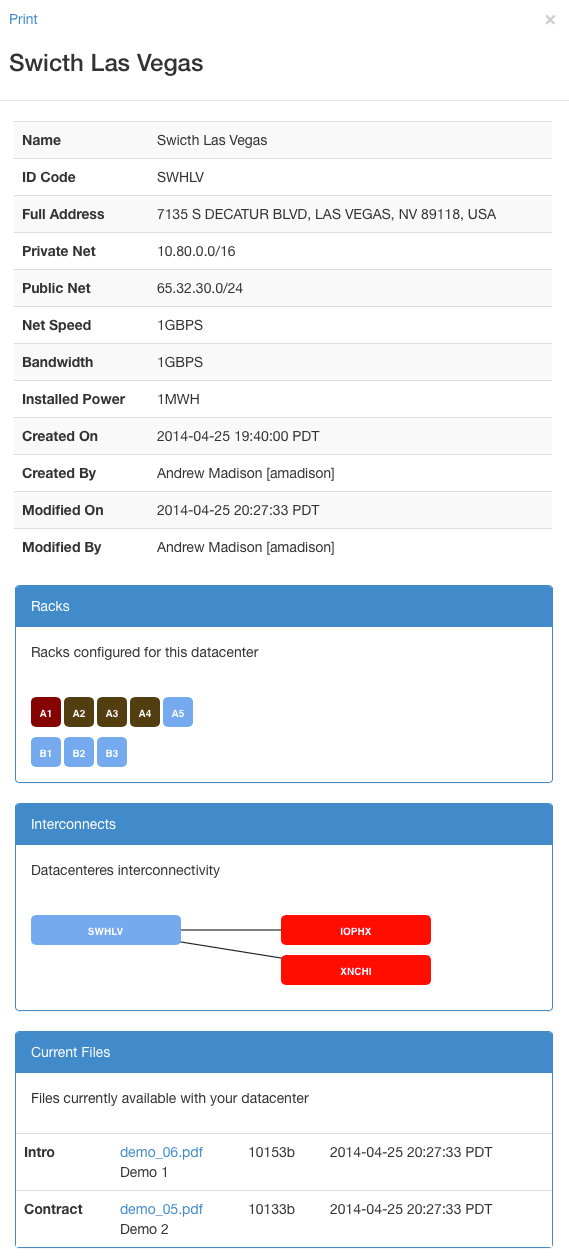
The Datacenter view will present the details about your location, Rack position, datacenter connectivity and related documents.
This page also has a print option which will display a printer friendly page.
Rack color coding:
| A1 | Network (row A, rack 1) |
| A2 | Storage (row A, rack 2) |
| A3 | Server (row A, rack 3) |
| A4 | Cabinet (row A, rack 4) |
To edit an existing datacenter, click the associated "Edit" link.
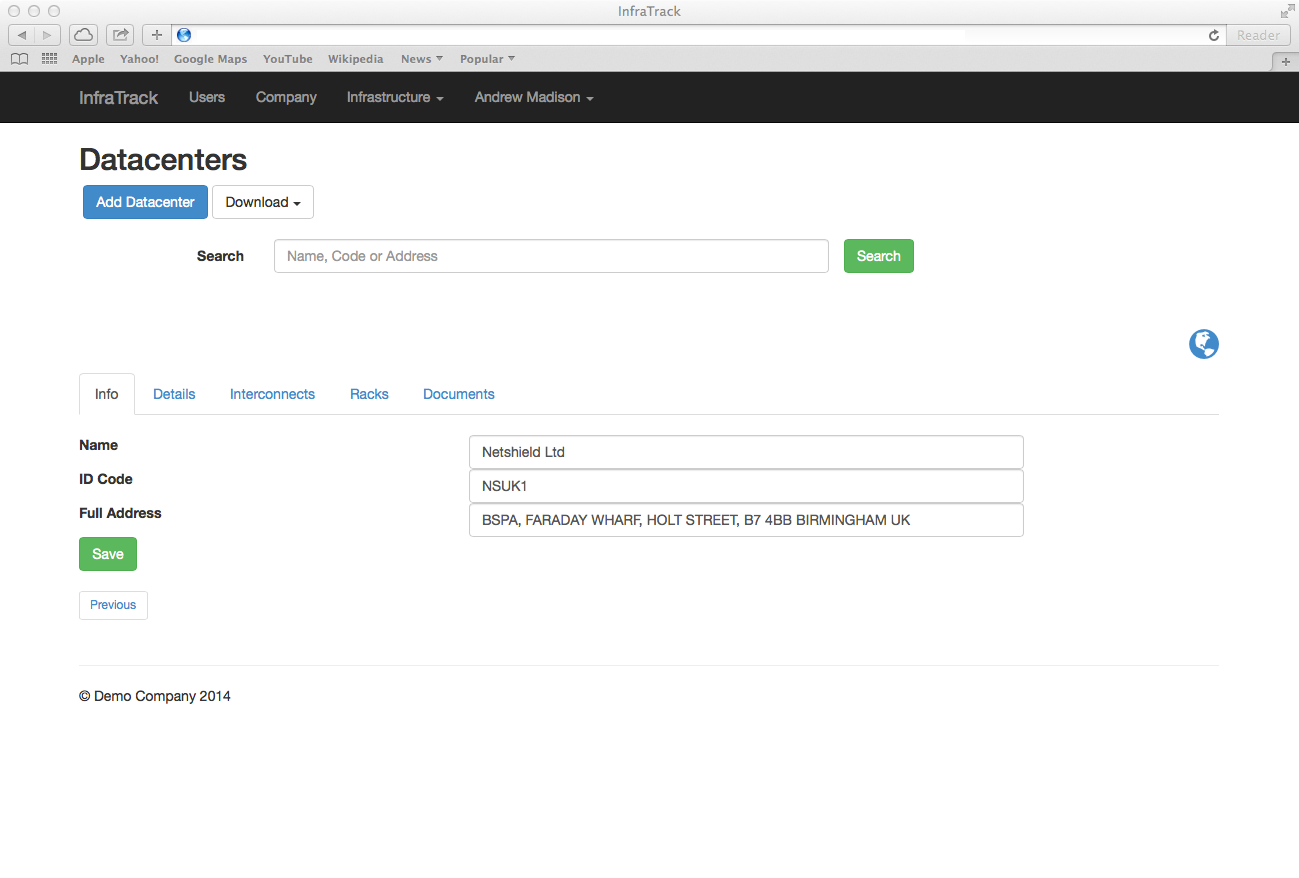
The edit feature is split in 5 sections:
- Info
- Details
- Interconnects
- Racks
- Documents
Info contains information about your datacenter like Name, Unique ID Code and Address
Details contains information about network configuration, bandwidth and power
Interconnects represents your datacenter connectivity with other datacenters in your organization
Racks allows you to design a datacenter map containing your racks, size and type
Documents is a document upload section for your datacenter
Note:
All fields in the datacenter edit feature are customizable. The Datacenter name, address and Unique ID are mandatory and cannot be left blank. A unique name and ID must be provided.
Adding a datacenter can be accomplished by clicking the “Add Datacenter” button. This option is similar to the Edit feature with the exemption of the Interconnects and Racks tabs which are not available.
Note:
Deactivating a datacenter will disable it from its relation with existing devices and datacenters, yet it will NOT remove it from your list.
The Download option allows a user to download the entire template dataset as JSON or XML data for use with data modeling applications or Relational Database systems.
Devices
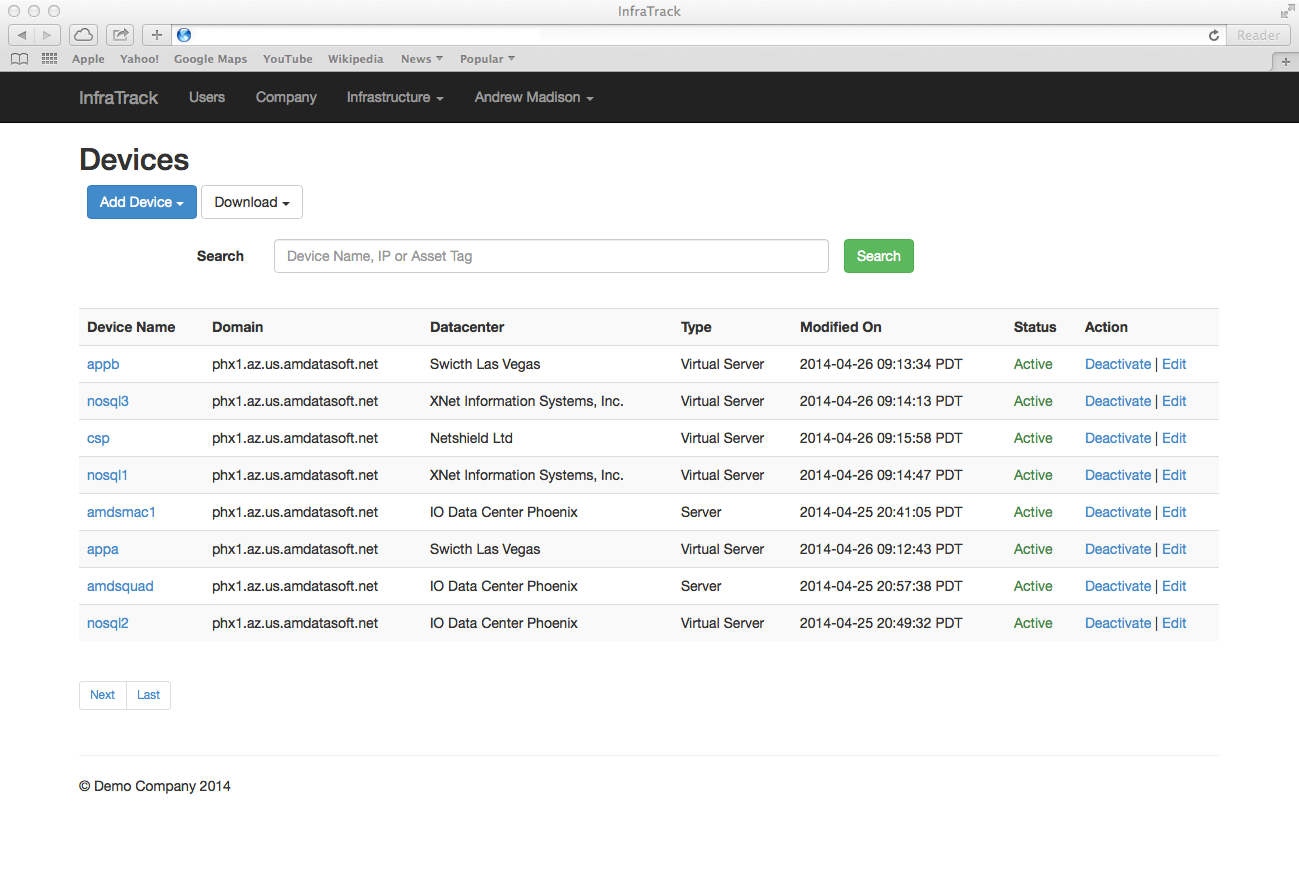
Based on Templates and Datacenters items relationship, a device can be added using an existing Template and datacenter. The Devices page is available from either the Dashboard page or from the Infrastructure menu.
Like the Datacenters page, the Devices feature allows a user to view, add, edit, search and de-activate/activate a device.
Click the "Add Device" button to add a device.
From the drop down "add" menu you will have to choose an existing template that will be used to create this device, so it is mandatory that all your templates are finalized and tested before adding devices.
The Add Device feature allows the user to add information based only on the pre-selected template. Additional features are available in the device edit section.
Below is an example of adding a Virtual server to your infrastructure:
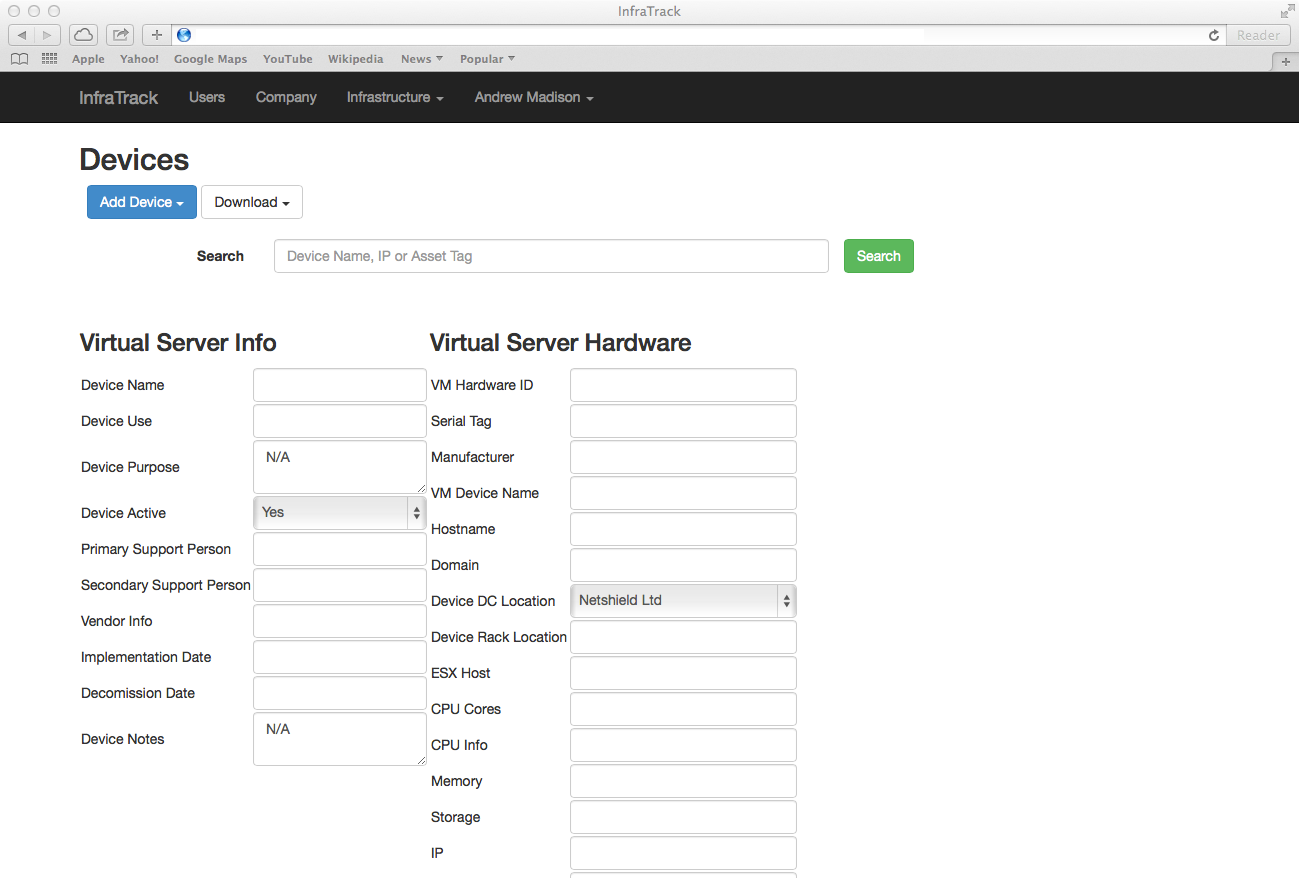
When done, click the Save button to save your changes. The new device will be now visible on the main list.
To edit a device, click the edit link.
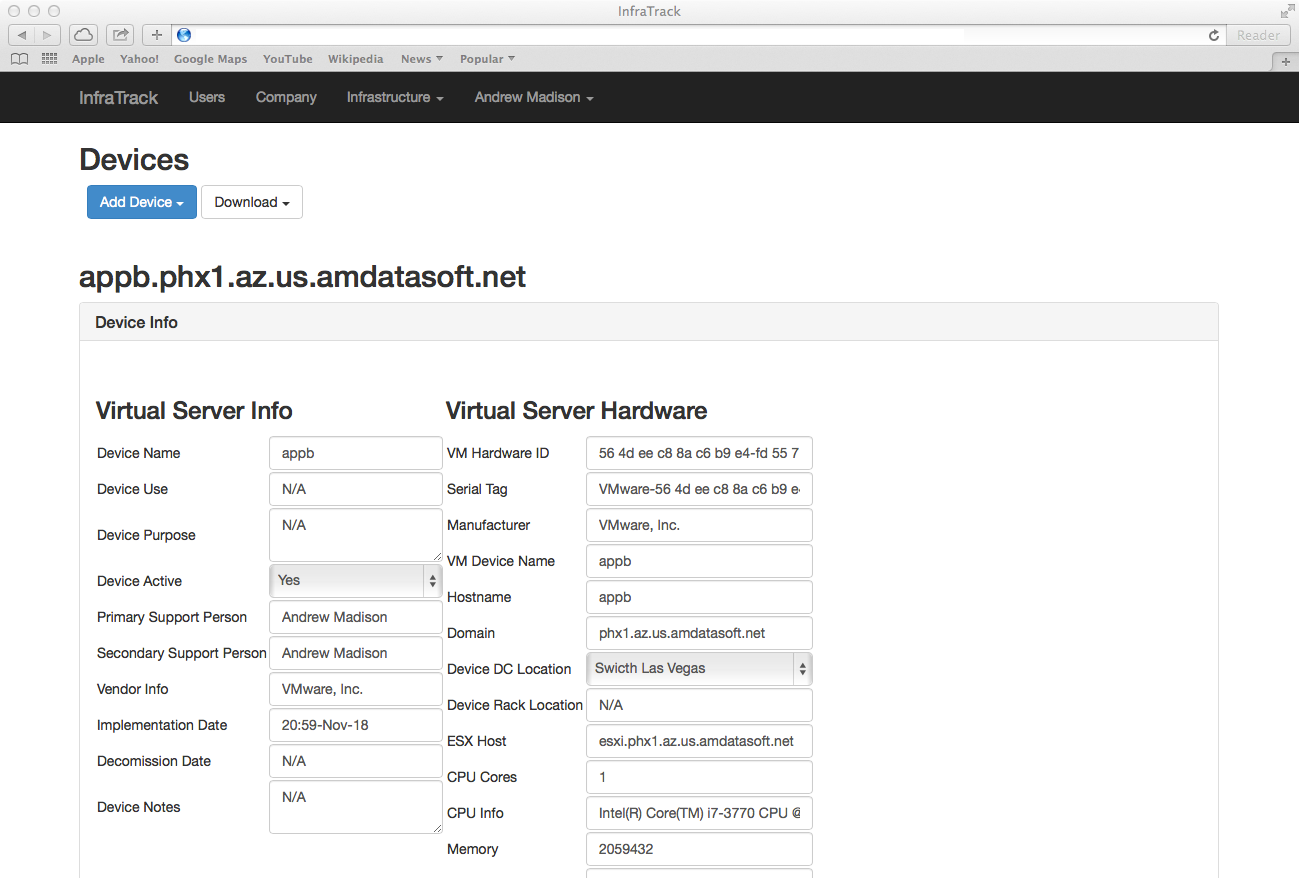
The edit page is split in 5 sections:
- Info
- Interconnects
- Processes
- Accounts
- Documents
Info section represents the template fields that were filled out when the device was initially added
Interconnects section represents a list of existing devices that connect to this machine and depend on its services.
Processes section lists all available services and scheduled tasks running on this device
Accounts lists all configured accounts for this device (user logins, database accounts, service accounts and all other security related accounts)
Documents lists all available files for this device (purchase order, documentation, warranty and vendor information, etc.)
Interconnects:
Pick a host that will be connecting to this device, specify the protocol, port will be connecting to and provide details in the Notes section. To add additional interconnects, click the "Add Interconnect" button. To remove an existing entry, click the "Remove Interconnect" button. When done, click the "Save" button.
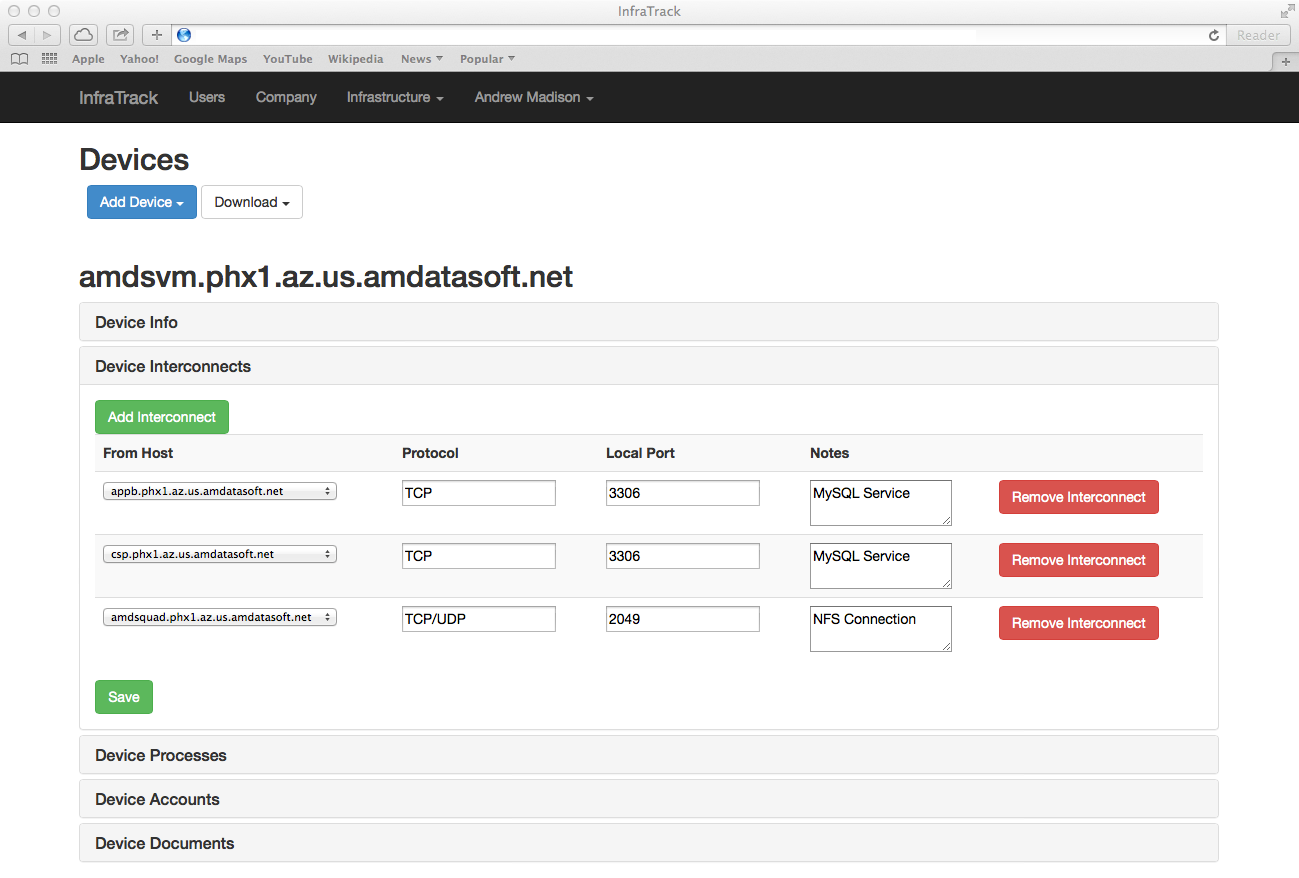
Multiple interconnects from the same host using the same protocol and port are allowed.
After saving the interconnects list, you will be returned to the devices list page.
Processes:
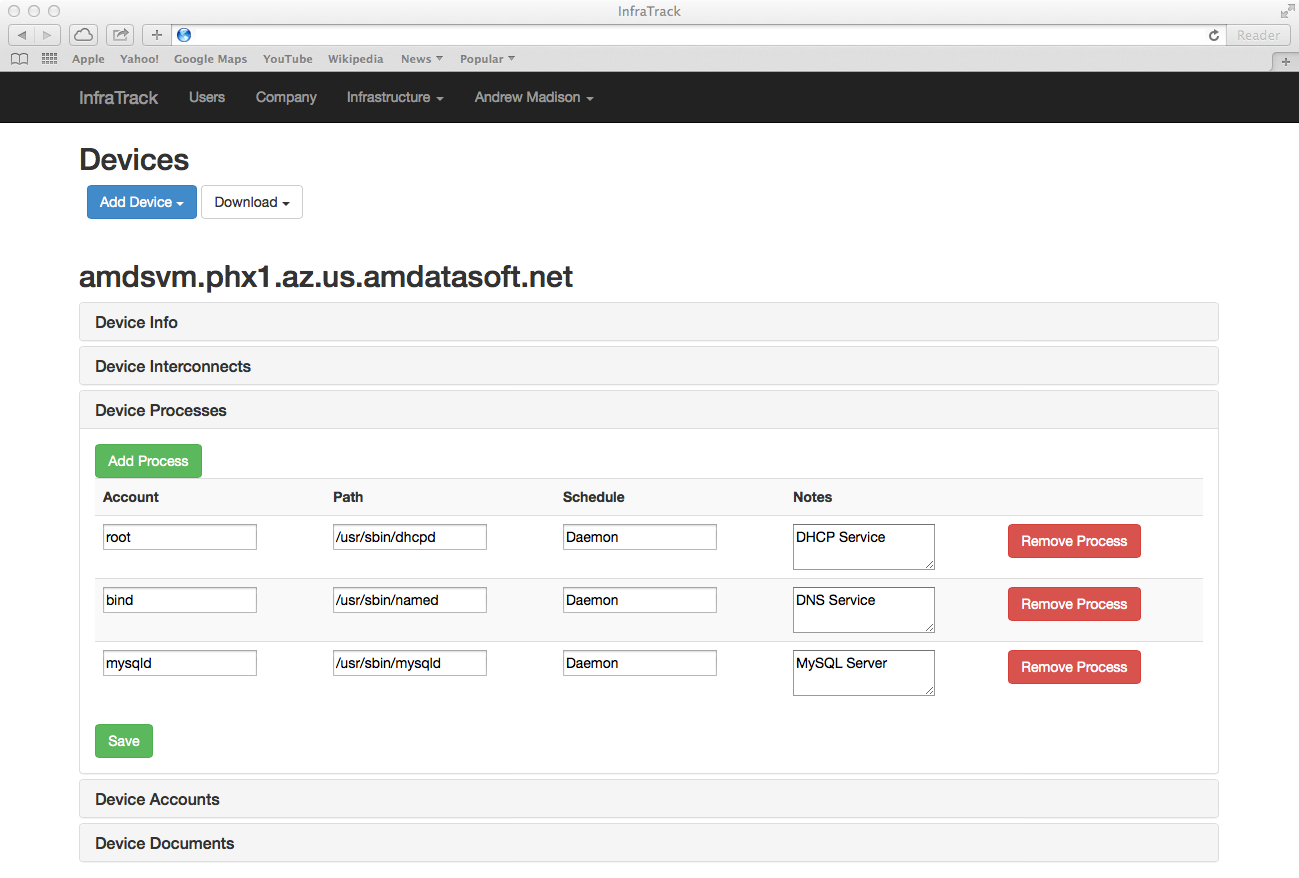
Add the account under which the process is running, path to the executable schedule type (Daemon if the process is running as a service, HH:MM if the process is running as a scheduled task) and related notes. To add additional processes, click the "Add Process" button. To remove an existing entry, click the "Remove Process" button. When done, click the "Save" button. After saving the processes list, you will be returned to the devices list page.
Accounts:
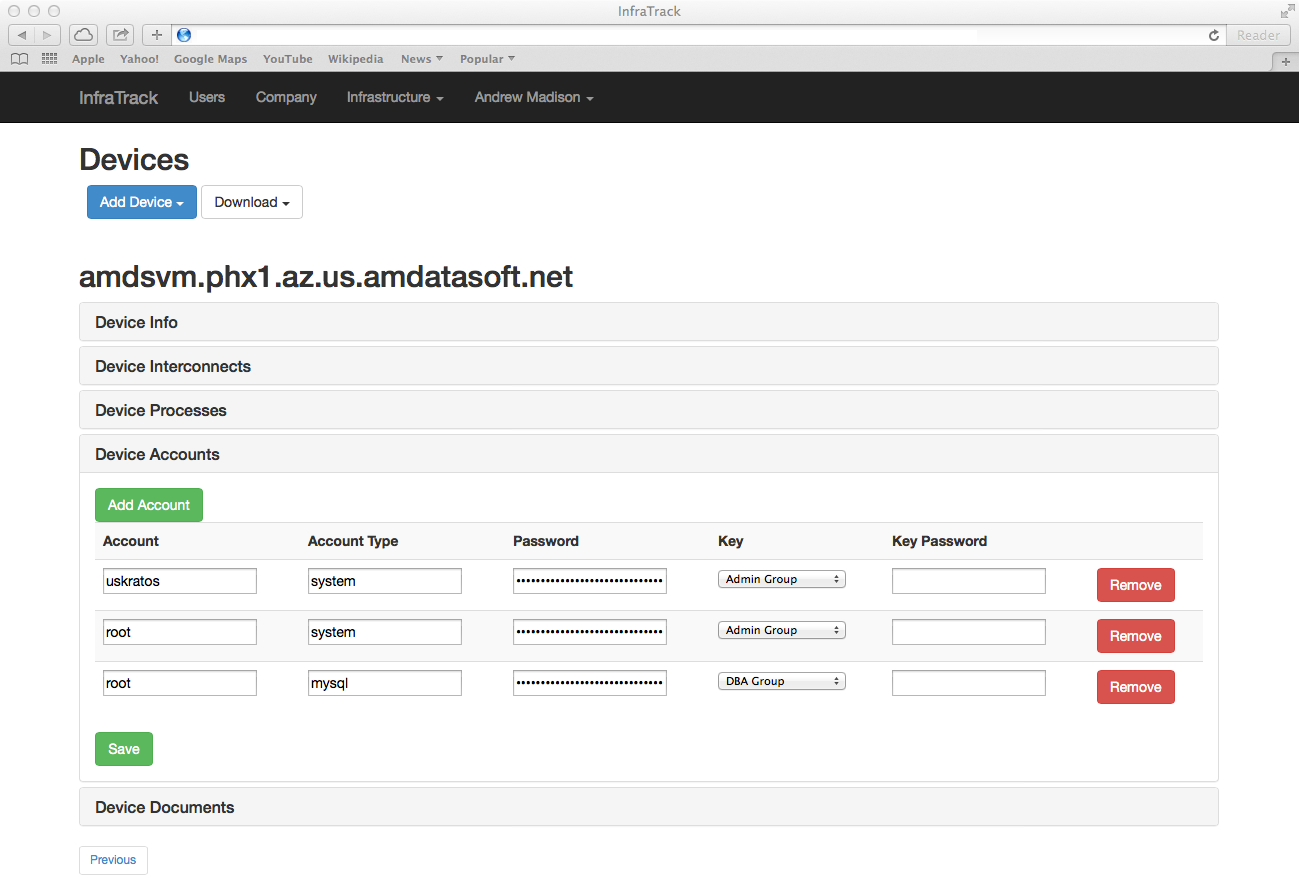
Before adding accounts, your system administrator must create first a security key and associated groups for the desired security levels in your organization. Security levels should be based on the type of access provided to your users (application, system, database, network, etc.). Consult the administration guide on how to generate and assign security keys.
Once the keys are created and the security passwords available, add accounts using the form below by specifying the account, account type, password, security group key and related key password.
To add additional accounts, click the "Add Account" button. To remove an existing entry, click the "Remove Account" button. When done, click the "Save" button. After saving the accounts list, you will be returned to the devices list page.
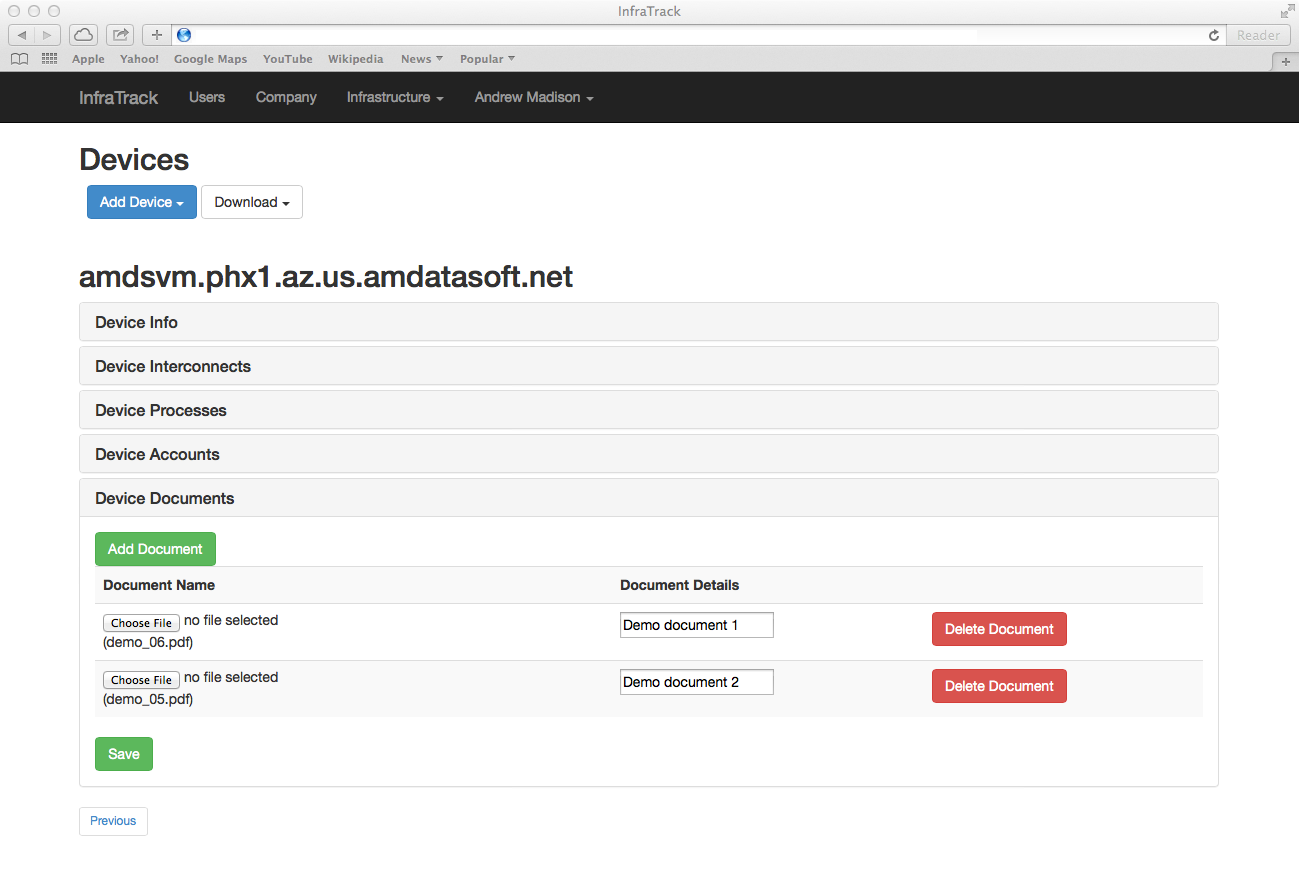
Documents:
The documents section allows the user to upload files related to the device. Document toes can be in any format and must not exceed the configured upload file size. Consult with your system administrator to identify the maximum file size allowed for the upload.
To add additional documents, click the "Add Document" button. To remove an existing entry, click the "Remove Document" button. When done, click the "Save" button. After saving the documents list, you will be returned to the devices list page.
Once all 5 sections for the device are complete, you will be able to see them in the device details page:
Interconnects:

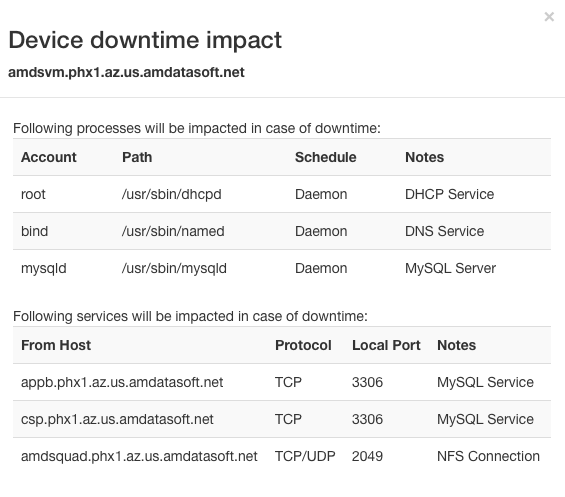
If interconnects are configured for your device, you will also see a "Downtime impact" link which lists all affected devices and processes if this device were to become unavailable.
Processes:

Accounts:

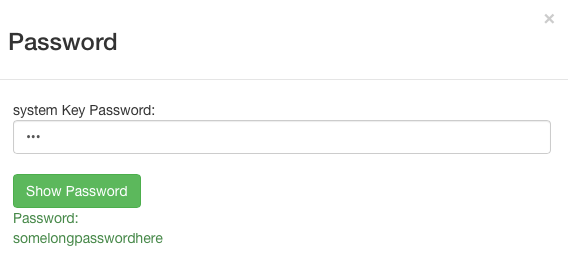
Clicking on the "Show Password" link will open a pop-up window where the key password for the group must be provided. This will reveal the password for the account. Failing to provide a valid key password will result in no record being displayed.
Documents:

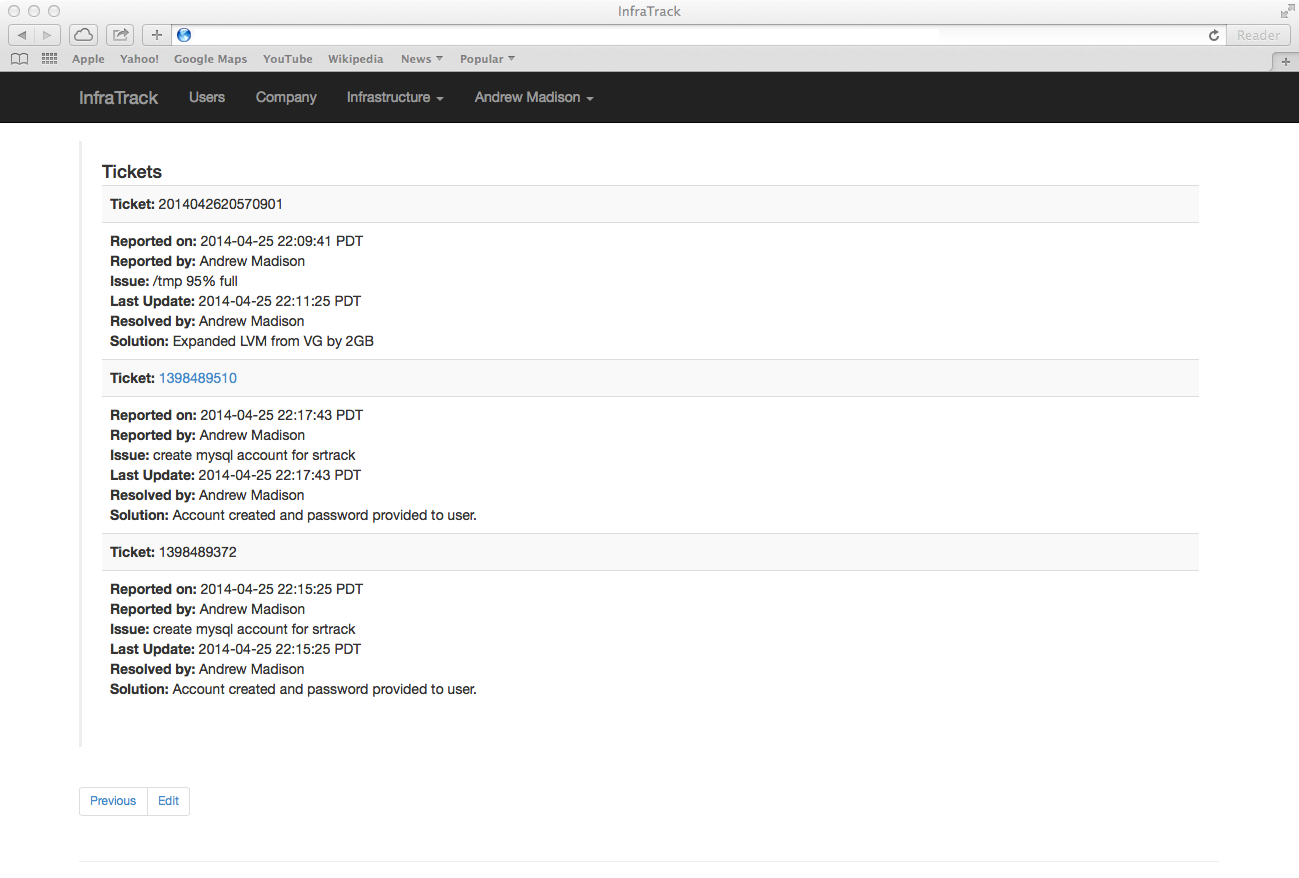
Depending on your system configuration, you may also see an additional section named Tickets. This section represents a list of tickets opened for your device. This section is not editable and will only display if you have your existing ticketing system to trigger data events to the InfraTrack API.
Company
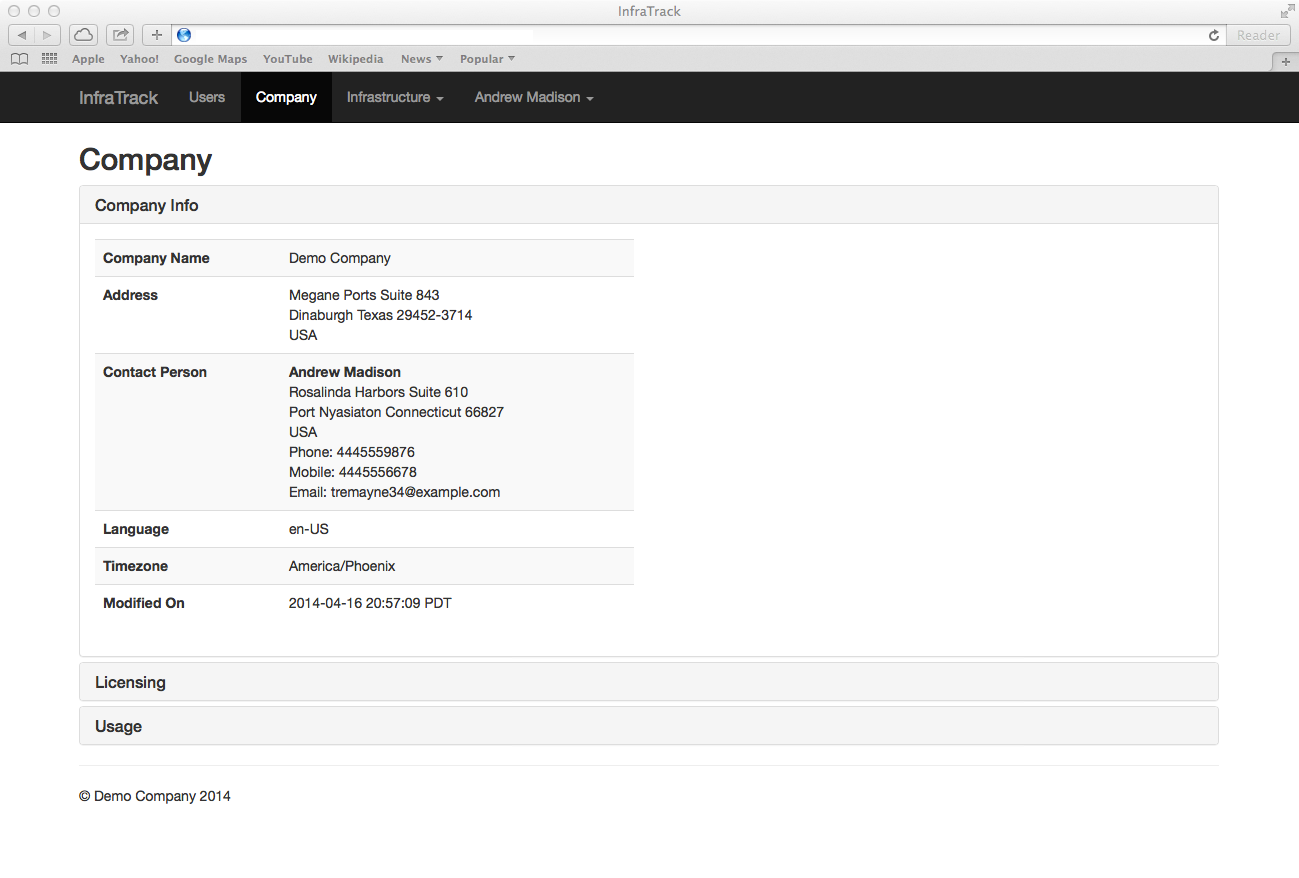
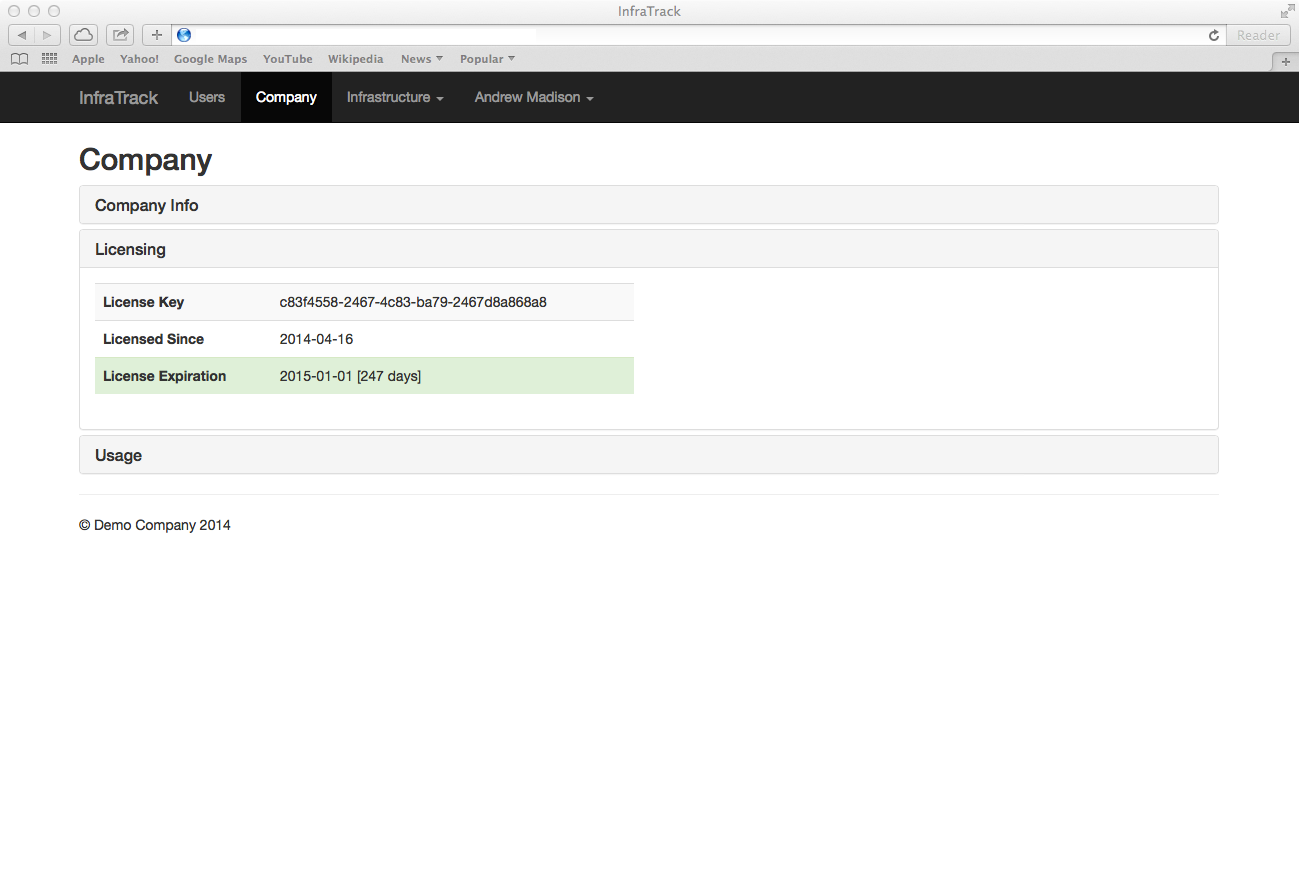
The purpose of this page is to present some basic information about your company, contact and support information, licensing and utilization.
Expand each section to view details.
General Info:
Licensing:
Usage:
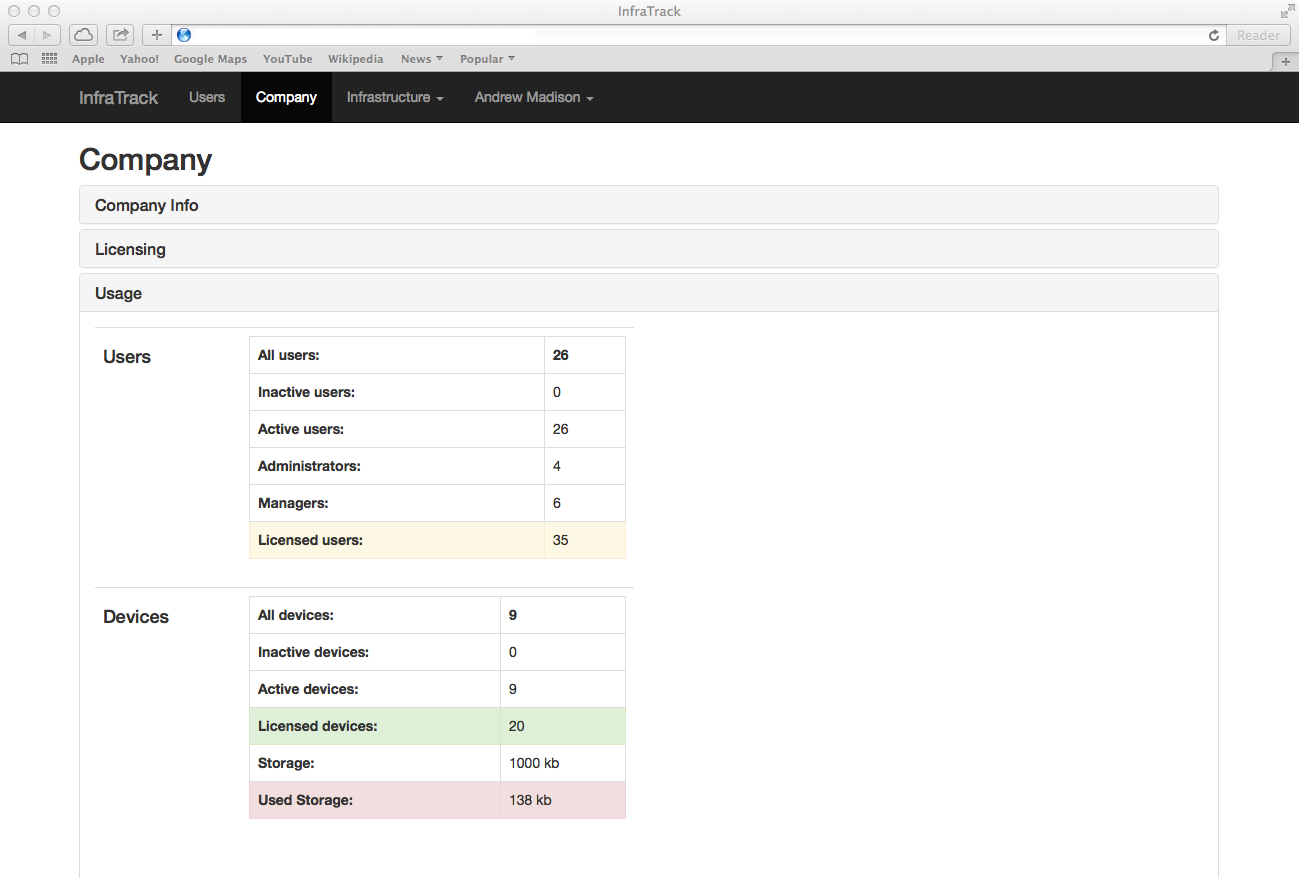
Color coding:
| License in good standing | |
| License will require attention soon | |
| License requires immediate attention |
Note:
No data on this page is editable.
Users
The user account management page provides the following actions:
- Add User
- Edit User
- Activate/Deactivate user
- Download data
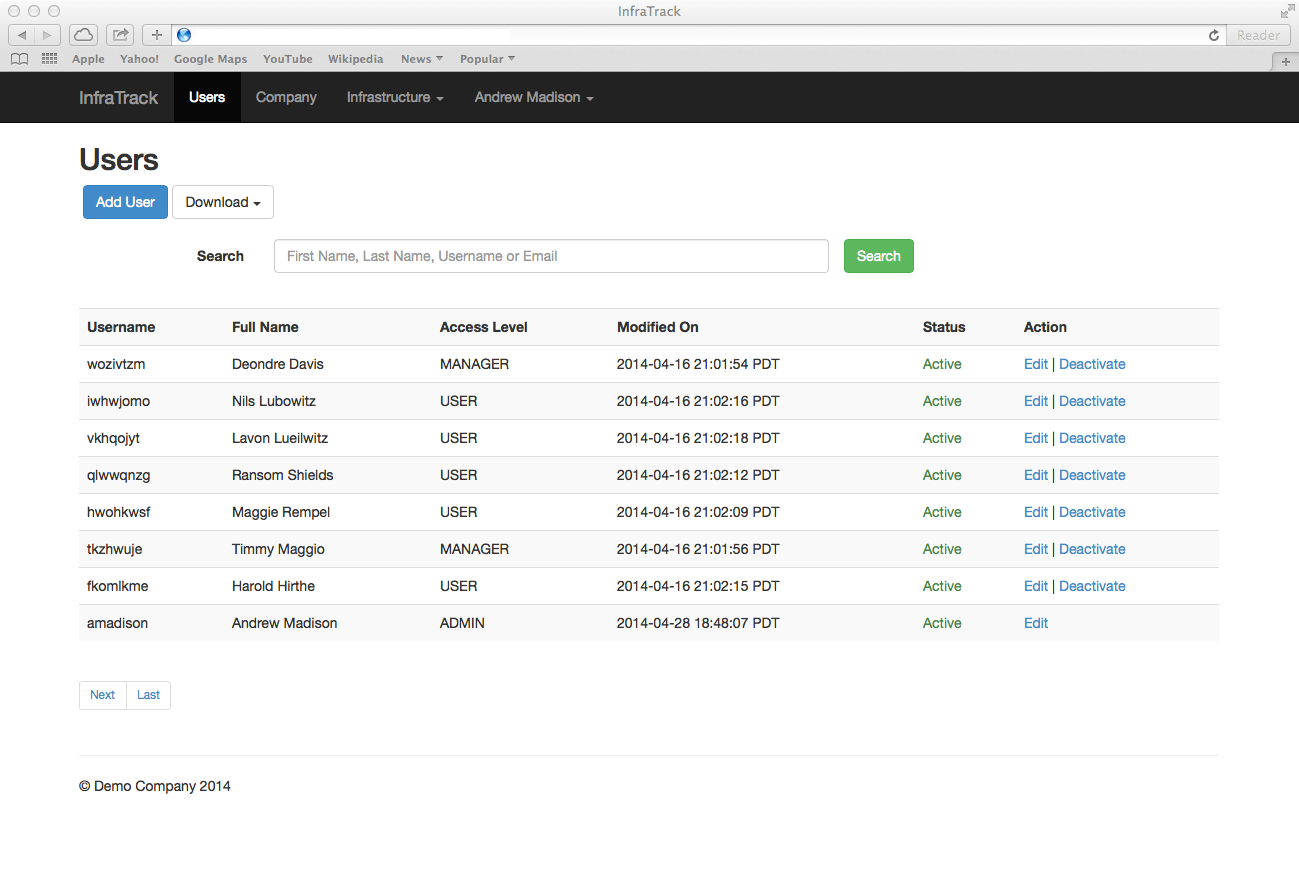
Click the "Add User" button to add a new user.
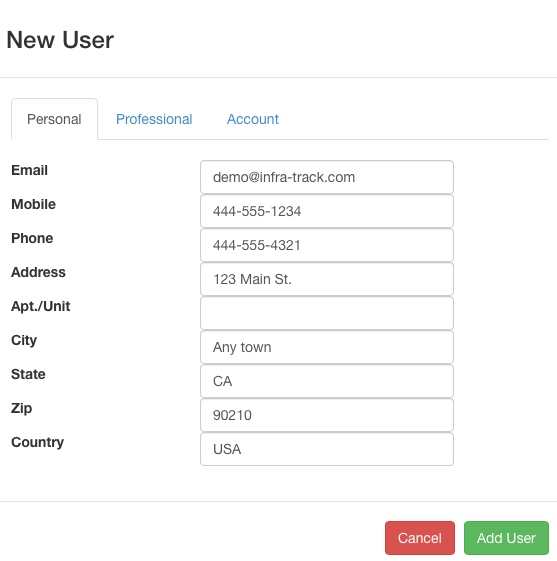
This section contains 3 tabs:
- Personal: Personal information
- Professional: Professional (company) information
- Account: account login details and localization preferences
Please ensure that all languages are configured in your environment before assigning a user to a specific locale. Failing to do so will default the user to English (US). Consult with your system administrator and follow the administration guide before assigning a language.
All assigned values (except security level) can be later on edited by the user.
Note:
User accounts must be unique.
A user cannot be demoted and you cannot de-activate a user in the same or higher rank.
The Edit User function presents a form similar to the Add User window. Here you will notice that the username cannot be changed. Also, changing the user role for a user in your rank or higher is prohibited and will not take effect.
The Download option allows a user to download the entire template dataset as JSON or XML data for use with data modeling applications or Relational Database systems. Account passwords are MD5 encrypted and cannot be reversed.
Profile
The Profile page can be accessed from "Your Name" menu drop down and allows a user to make changes to his configured account. Similar to the Users page, the function is split in 3 sections:
- Personal: Personal information
- Professional: Professional (company) information
- Account: account login details and localization preferences
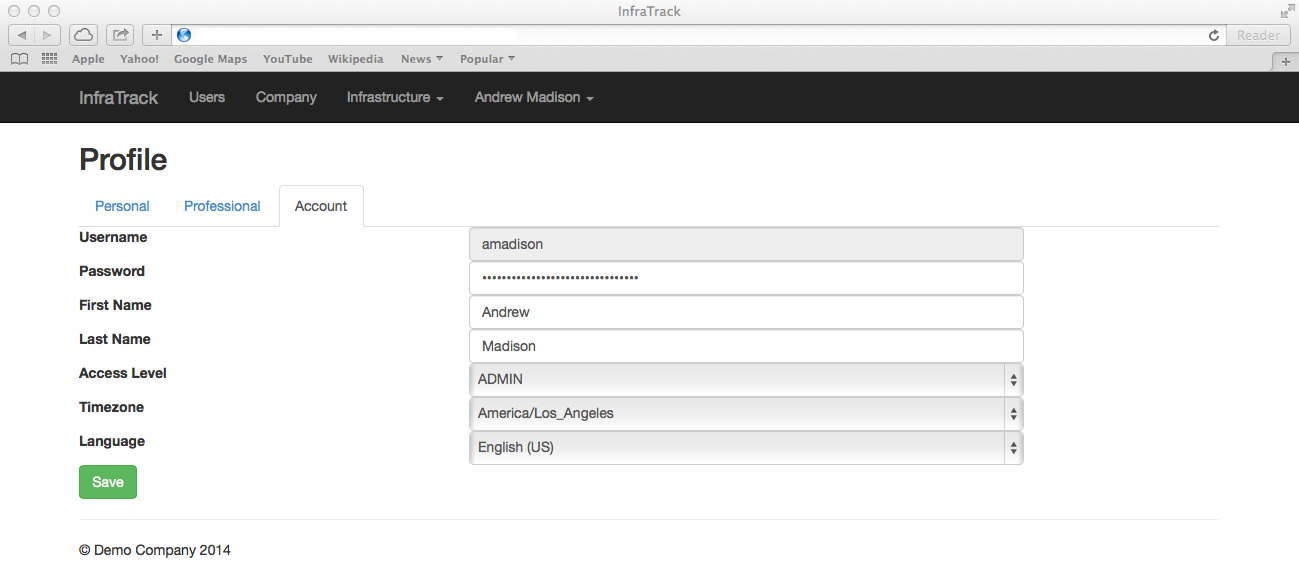
Note:
You cannot change your username and security level.
All changes made on your profile will take effect immediately.
Info
The info page provides the following 3 features:
- About You
- Your Sessions
- Server
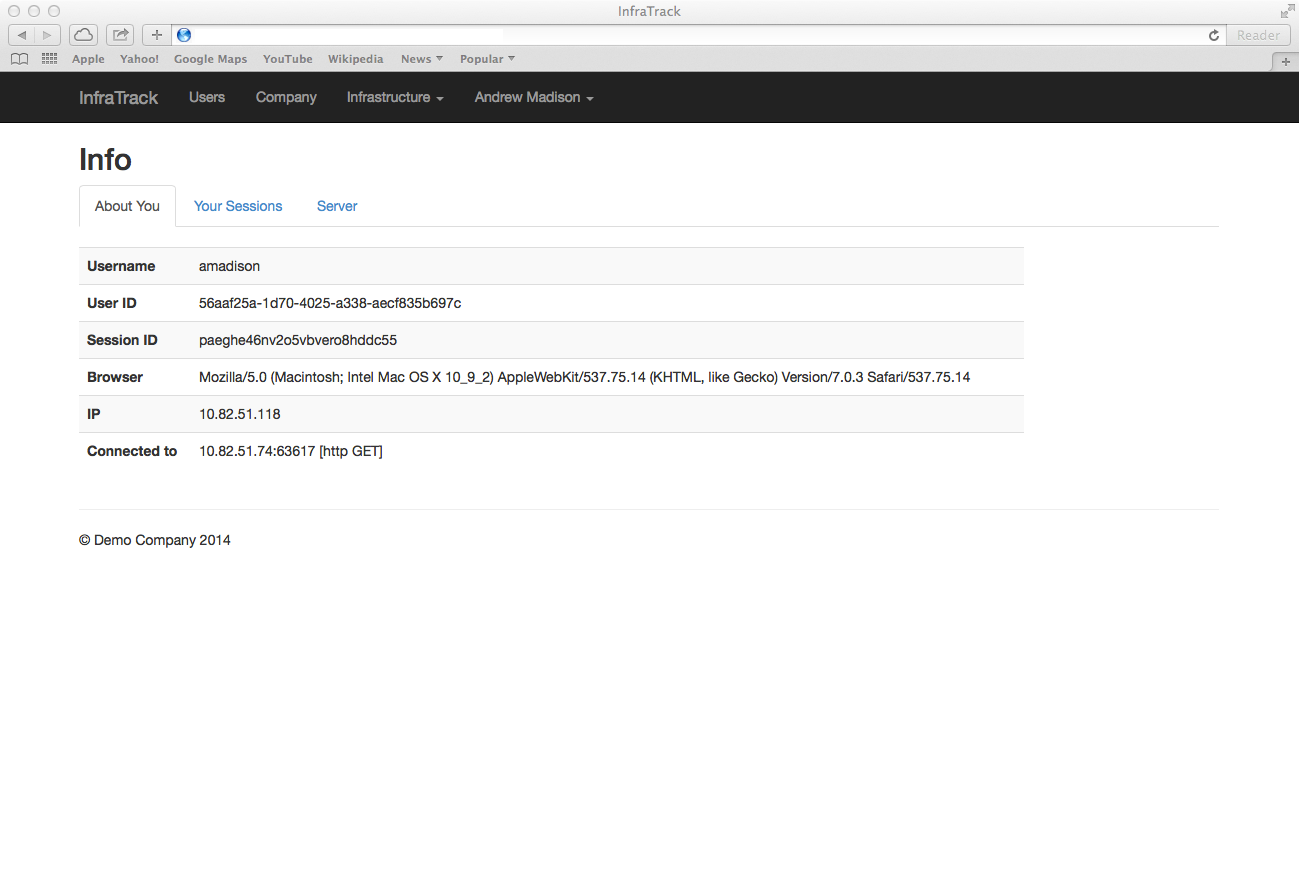
About You
This page shows information about the session you currently have created on the server, including your username user id and client details. This information may be valuable when requesting support.
Your Sessions
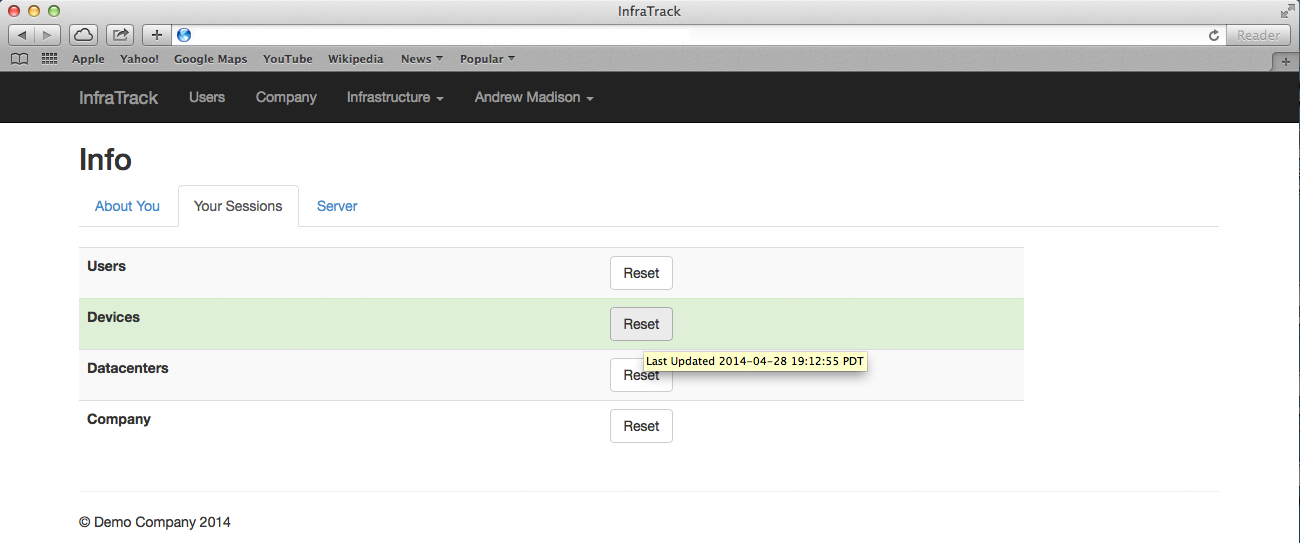
Because the portal application only refreshes data when changes occur, a "Session Refresh" option is provided that allows a user to refresh the current loaded datasets. Click the Reset button to load data in your session. Hovering over the "Reset" button will show you the last time the session was loaded.
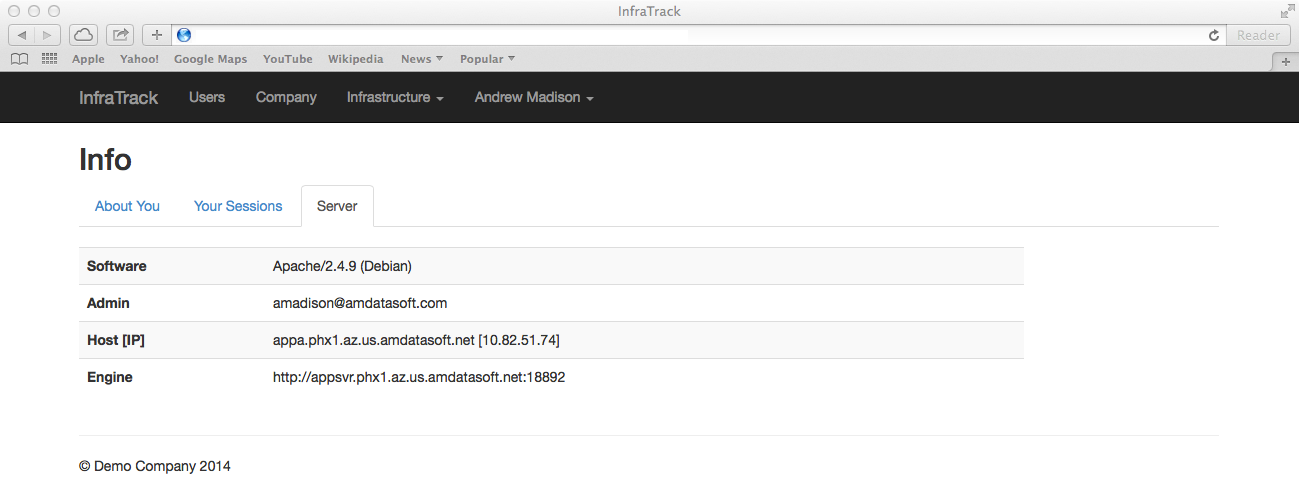
Server
This page shows generic information about your connection and can be used when requesting support.
Note:
The admin email address may not represent the contact for your InfraTrack application administrator.
Features security
3 main security groups control access to application features. The groups are:
- Administrators
- Managers (identical rights to administrators)
- Users
This chart describes access to each of the features:
| Feature: | Administrator | Manager | User | |||||||||
|---|---|---|---|---|---|---|---|---|---|---|---|---|
| Dashboard | N/A | N/A | YES | N/A | N/A | N/A | YES | N/A | N/A | N/A | YES | N/A |
| Templates | YES | YES | YES | YES | YES | YES | YES | YES | NO | NO | NO | NO |
| Datacenters | YES | YES | YES | YES | YES | YES | YES | YES | NO | NO | YES | NO |
| Devices | YES | YES | YES | YES | YES | YES | YES | YES | YES | YES | YES | YES |
| Company | N/A | N/A | YES | N/A | N/A | N/A | YES | N/A | NO | NO | NO | NO |
| Users | YES | YES | YES | YES | YES | YES | YES | YES | NO | NO | NO | NO |
| Profile | N/A | YES | YES | N/A | N/A | YES | YES | N/A | N/A | YES | YES | N/A |
| Info | N/A | N/A | YES | N/A | N/A | N/A | YES | N/A | N/A | N/A | YES | N/A |
| Action: | A | E | V | S | A | E | V | S | A | E | V | S |
Legend:
- A
- Add
- E
- Edit
- V
- View
- S
- Status (Activate/Deactivate)